
Z-Image: The Complete Guide to the Open-Source AI Image Generator That's Changing Everything
A 6-billion-parameter open-weight model that runs on consumer GPUs, generates photorealistic images in seconds, and costs nothing to use. That's Z-Image — and whether you're a developer integrating an API, an artist building ComfyUI workflows, or a creator who just wants great images fast, this guide covers everything you need.

What Is Z-Image?
Z-Image is an open-source text-to-image generation model developed by Alibaba's research team. Built on a single-stream Diffusion Transformer (DiT) architecture, it processes image patches and text tokens through a unified transformer backbone — a simpler, more efficient design compared to dual-stream alternatives like Stable Diffusion 3 or Flux.
The model comes in two main variants:
- Z-Image Base: The full-precision model delivering maximum image quality and creative diversity. Ideal when quality matters more than speed.
- Z-Image Turbo: A distilled, 6B-parameter variant optimized for speed. It generates 2K resolution images (up to 2048×2048) with bilingual text rendering in both English and Chinese.
Since its release, Z-Image has been called "the first successor to Stable Diffusion 1.5 that delivers better quality, capability, and extensibility across the board in an open model" by the Hacker News community — a significant claim in a field crowded with contenders.
Why Z-Image Matters Right Now
Three things set Z-Image apart from the pack in 2026:
1. True open-weight accessibility. Unlike Midjourney or DALL-E, Z-Image's weights are publicly available. You can run it locally, fine-tune it with LoRA, and deploy it on your own infrastructure without per-image fees.
2. Consumer GPU performance. Z-Image Turbo runs comfortably on an RTX 2060 — a GPU from 2019. This isn't a model that requires a data center; it's designed for the hardware you already own. For tips on running it efficiently, our 8GB VRAM guide breaks down the exact settings.
3. Free, unlimited API access. Through ModelScope, Z-Image Turbo inference is completely free with no usage caps. Third-party providers like AIMLAPI also offer it at roughly $0.004 per image — making it one of the cheapest production-grade image generation options available.
Architecture: How Z-Image Actually Works
Under the hood, Z-Image uses a single-stream DiT design. Here's what that means in practice:
- Patch-based processing: Images are split into patch tokens (similar to Vision Transformers), then processed through transformer blocks.
- Unified token stream: Unlike dual-stream models that maintain separate pathways for text and image tokens, Z-Image concatenates everything into a single sequence. This simplifies the architecture and reduces computational overhead.
- Adaptive Layer Normalization (adaLN): Timestep and text conditioning are injected through adaptive scale and shift parameters, giving the model fine-grained control over the denoising process.
For a deeper technical breakdown of the S3-DiT architecture, our architecture deep dive covers the math and design decisions behind the model.
Prompting Z-Image: What Actually Works
Z-Image responds differently than older Stable Diffusion models. The prompting habits you developed for SDXL or SD 1.5 won't always transfer. Here's what consistently produces the best results:
The 6-Part Prompt Formula
A reliable structure that works across most use cases:
[Subject] + [Action/Pose] + [Setting/Background] + [Lighting] + [Camera/Style] + [Quality modifiers]
Example — weak prompt:
a cat in a library
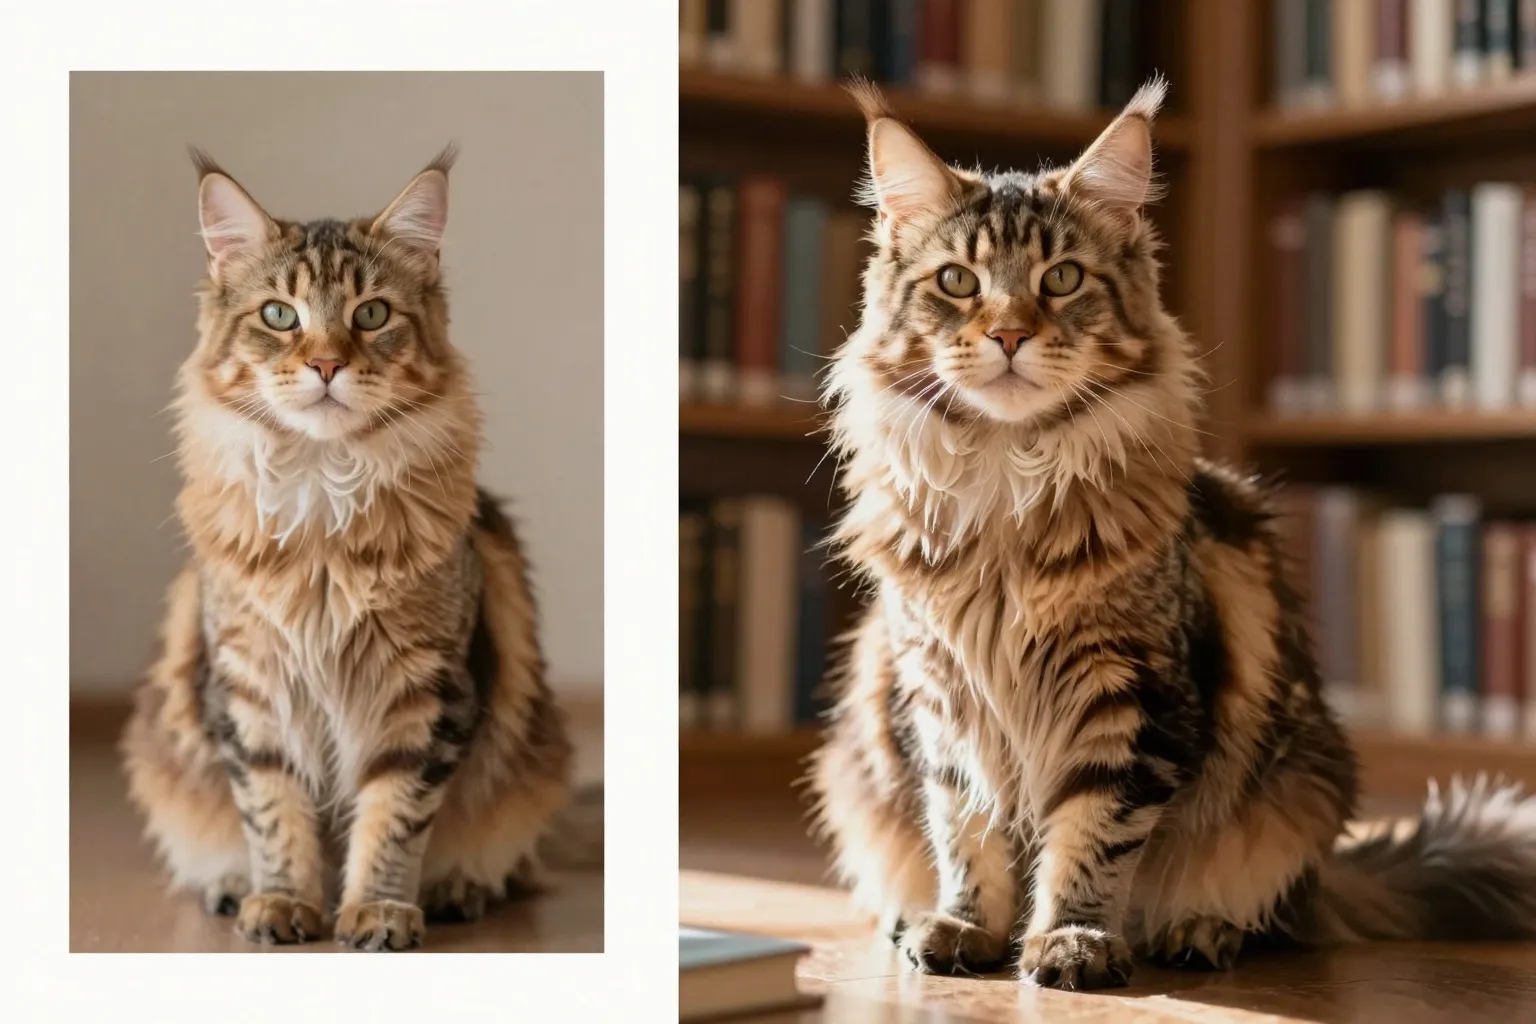
Example — strong prompt:
a majestic Maine Coon cat sitting regally on an antique oak desk, surrounded by leather-bound books in a dimly lit Victorian library, warm golden side-lighting from a stained glass window, shot on Hasselblad medium format, shallow depth of field, photorealistic, 8K detail
Key Prompting Differences from SDXL
- Natural language works better than tag soup. Z-Image understands full sentences better than comma-separated keyword lists.
- Negative prompts matter less. The model has stronger inherent quality — you don't need long negative prompts to avoid deformations.
- Style keywords transfer from SDXL. If you have favorite SDXL style triggers (like "cinematic lighting" or "trending on ArtStation"), many of them still work.
For a complete library of tested prompts and advanced techniques, check out our Z-Image Prompting Masterclass.
Z-Image vs the Competition
How does Z-Image stack up against the other major players? Here's the honest breakdown:
| Feature | Z-Image | Flux 2 | Midjourney V7 | DALL-E 3 |
|---|---|---|---|---|
| Open weights | Yes | Limited | No | No |
| Free tier | Unlimited (ModelScope) | Limited | No | Limited |
| Max resolution | 2048×2048 | 2048×2048 | 2048×2048 | 1024×1024 |
| Text rendering | English + Chinese | English | English | English |
| Local deployment | Yes | Yes | No | No |
| LoRA fine-tuning | Yes | Yes | No | No |
Z-Image's advantage is clear when you need open access, free usage, and local deployment. Midjourney still wins on pure aesthetic quality for artistic work, and Flux 2 offers strong competition — but neither matches Z-Image's combination of accessibility and capability. For a more detailed head-to-head, see our Z-Image vs Midjourney vs Flux comparison.
Getting Started: Three Paths
Path 1: Use It Free Online
The fastest way to try Z-Image is right here — no account needed. Head to the Z-Image Base generator page and start creating immediately.
Path 2: Local Installation via ComfyUI
For full control over your workflow:
- Install ComfyUI
- Download the Z-Image Turbo checkpoint from Hugging Face
- Place it in your
models/checkpoints/directory - Load a Z-Image workflow JSON (the ComfyUI workflow guide has starter templates)
- Start generating
Z-Image Turbo runs on as little as 8 GB VRAM with GGUF quantization, making it accessible even on older hardware.
Path 3: API Integration
For developers building applications:
import requests

response = requests.post(
    "https://api.wavespeed.ai/api/v3/wavespeed-ai/z-image/turbo",
    headers={"Authorization": "Bearer YOUR_API_KEY"},
    json={
        "prompt": "A serene Japanese garden at golden hour, koi pond reflecting maple trees",
        "size": "1024*1024"
    }
)

image_url = response.json()["data"]["urls"][0]
Pricing varies by provider:
- ModelScope: Free, unlimited
- Cloudflare Workers: Free, 100 requests/day
- Kie AI: ~$0.004/image
- 302.AI: Pay-per-use
Best Practices for Production Use
Based on community testing and our own benchmarks:
-
Use Turbo for iteration, Base for final output. Turbo is fast enough for rapid prototyping. Switch to Base when you need maximum quality.
-
Batch your generations. When you find a prompt structure that works, generate 10–20 variations at once and curate the best. Our batch processing guide covers the exact setup.
-
Leverage image-to-image for refinement. Don't start over when a generation is 80% there. Use img2img with low denoising strength to fine-tune details.
-
Use LoRA for consistent styles. Training a LoRA on 15–20 images of your desired style gives you reproducible results across thousands of generations.
-
Monitor your VRAM. If you're running into out-of-memory errors, our memory management guide has solutions for workflows of any size.
The Bottom Line
Z-Image represents a genuine shift in AI image generation — not because it's the absolute best at any single metric, but because it's the first open model that's good enough at everything and accessible to everyone. Free, open-weight, runs on consumer hardware, generates bilingual text, and produces photorealistic output that rivals paid services.
Whether you're a hobbyist experimenting on a gaming PC or a startup building image generation into your product, Z-Image deserves a spot in your toolkit. Start generating for free on Z-Image Base or explore the Turbo model for faster results.
Ready to dive deeper? Browse all Z-Image tutorials and guides on our blog.