The Z-Image Turbo (Tongyi-MAI) release has completely shifted the landscape. While everyone was distracted by Flux.1's heavy VRAM requirements, Alibaba quietly dropped a 6B parameter beast that produces photorealistic results in just 8 steps.
If you are tired of waiting 30 seconds for a generation or OOM-ing on your RTX 3060/4070, this guide is for you.
This isn't just a model download link; it's the missing manual on how to actually run Z-Image Turbo in ComfyUI without the "black image" errors or broken text encoders.
Why Z-Image Turbo Matters (The 12GB Sweet Spot)
Most "Turbo" models trade quality for speed. Z-Image Turbo uses a Single-Stream DiT (S3-DiT) architecture, meaning it processes text and image tokens in a single sequence.
The Result: It understands complex prompts (especially text rendering) better than SDXL and runs faster than Flux Dev.
| Feature | Z-Image Turbo | Flux.1 Dev | SDXL Lightning |
|---|---|---|---|
| VRAM Usage | 6GB - 12GB (Optimized) | 16GB - 24GB | 8GB |
| Steps to Infer | 8 Steps | 20-50 Steps | 4-8 Steps |
| Text Rendering | Excellent (Bilingual) | Very Good | Average |
| Architecture | Single-Stream DiT | MM-DiT | UNet |
| License | Apache 2.0 (Commercial) | Non-Commercial | OpenRAIL |
Z-Image Turbo vs Flux 1 Dev image generation speed comparison - 3x Faster Generation
Prerequisites: Files You Actually Need
Many users fail because they treat Z-Image like Stable Diffusion. It is not. It requires a specific Text Encoder (Qwen) or it will not work.
- Update ComfyUI: You must be on the latest version (Nov 2025 build) to support the
ZImageLoadernodes. - Download These 3 Files:
- Diffusion Model:
z_image_turbo_bf16.safetensors(Place inmodels/checkpoints/) - Text Encoder:
qwen_3_4b.safetensors(Place inmodels/text_encoders/ormodels/LLM/depending on your custom nodes) - VAE:
ae.safetensors(Standard Flux VAE works, or the official Z-Image VAE. Place inmodels/vae/)
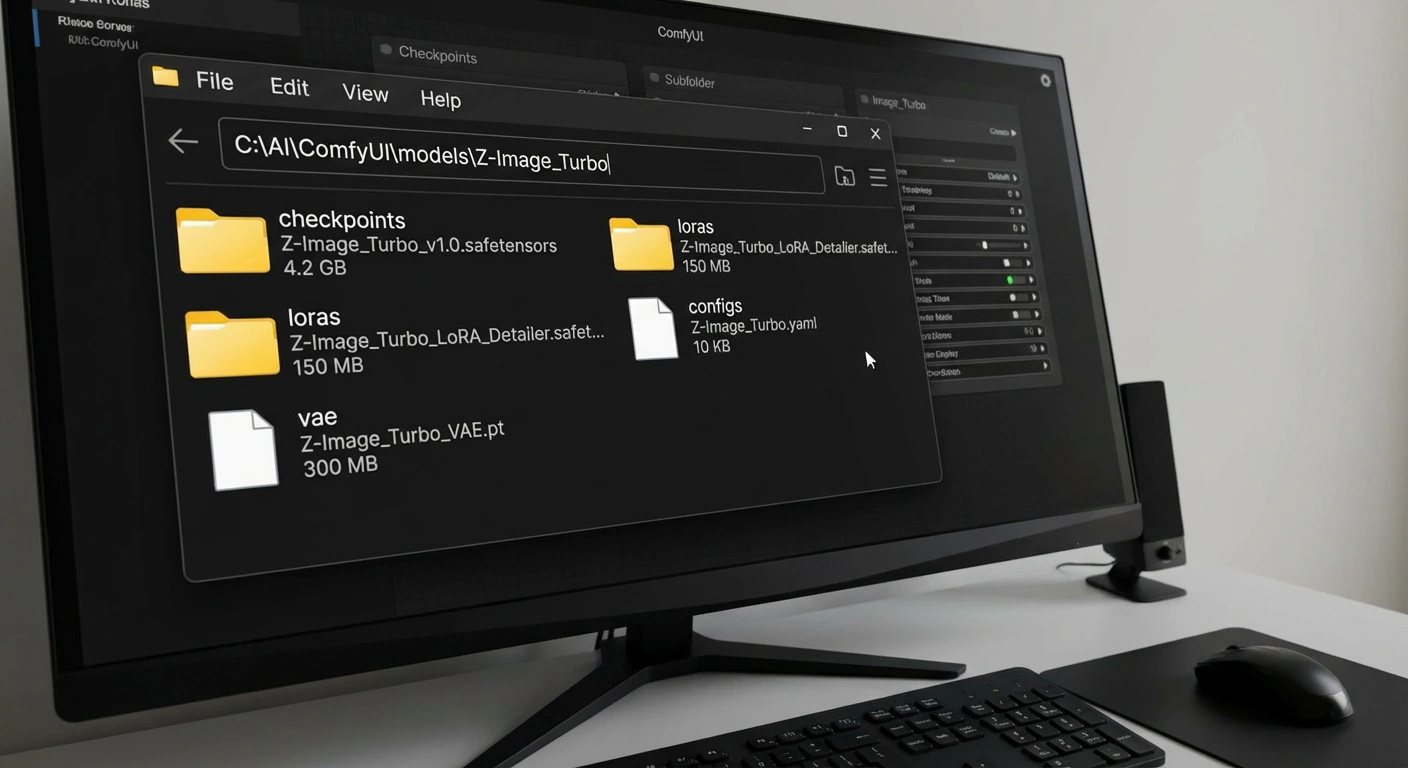
ComfyUI model folder structure for Z-Image Turbo
The "8-Step" ComfyUI Workflow
Stop overcomplicating your graph. Z-Image Turbo is a distilled model; it does not need negative prompts or complex samplers.
1. The Node Setup Logic
- Loader: Use the
CheckpointLoaderSimple(if updated) or the customZ-Image Model Loader. - Conditioning: You must use the Qwen tokenizer. Standard CLIP nodes will output garbage.
- Sampler:
- Steps:
8(Do not go higher; it degrades quality). - CFG:
1.0(Turbo does not need guidance). - Sampler Name:
euler_ancestralordpmpp_sde. - Scheduler:
sgm_uniform.
- Steps:
2. The JSON Workflow (Copy-Paste)
Save the code block below as z_image_turbo_workflow.json and drag it into your ComfyUI window.
{
  "last_node_id": 10,
  "last_link_id": 15,
  "nodes": [
    {
      "id": 1,
      "type": "CheckpointLoaderSimple",
      "title": "Load Z-Image Turbo",
      "properties": { "Node name for S&R": "CheckpointLoaderSimple" },
      "widgets_values": [ "z_image_turbo_bf16.safetensors" ],
      "outputs": [
        { "name": "MODEL", "type": "MODEL", "links": [ 1 ] },
        { "name": "CLIP", "type": "CLIP", "links": [ 2 ] },
        { "name": "VAE", "type": "VAE", "links": [ 3 ] }
      ],
      "pos": [ 50, 50 ]
    },
    {
      "id": 2,
      "type": "CLIPTextEncode",
      "title": "Prompt (Qwen Encoded)",
      "widgets_values": [ "cinematic photo, 8k, highly detailed, a futuristic cyberpunk street food stall, neon lights, rain, reflection, masterpiece" ],
      "inputs": [ { "name": "clip", "type": "CLIP", "link": 2 } ],
      "outputs": [ { "name": "CONDITIONING", "type": "CONDITIONING", "links": [ 4 ] } ],
      "pos": [ 400, 50 ]
    },
    {
      "id": 3,
      "type": "CLIPTextEncode",
      "title": "Empty Latent (No Negative)",
      "widgets_values": [ "" ],
      "inputs": [ { "name": "clip", "type": "CLIP", "link": 2 } ],
      "outputs": [ { "name": "CONDITIONING", "type": "CONDITIONING", "links": [ 5 ] } ],
      "pos": [ 400, 250 ]
    },
    {
      "id": 4,
      "type": "KSampler",
      "title": "8-Step Sampler",
      "widgets_values": [ 266481289456, "fixed", 8, 1.0, "euler_ancestral", "sgm_uniform", 1 ],
      "inputs": [
        { "name": "model", "type": "MODEL", "link": 1 },
        { "name": "positive", "type": "CONDITIONING", "link": 4 },
        { "name": "negative", "type": "CONDITIONING", "link": 5 },
        { "name": "latent_image", "type": "LATENT", "link": 6 }
      ],
      "outputs": [ { "name": "LATENT", "type": "LATENT", "links": [ 7 ] } ],
      "pos": [ 800, 100 ]
    },
    {
      "id": 5,
      "type": "EmptyLatentImage",
      "widgets_values": [ 1024, 1024, 1 ],
      "outputs": [ { "name": "LATENT", "type": "LATENT", "links": [ 6 ] } ],
      "pos": [ 500, 450 ]
    },
    {
      "id": 6,
      "type": "VAEDecode",
      "inputs": [
        { "name": "samples", "type": "LATENT", "link": 7 },
        { "name": "vae", "type": "VAE", "link": 3 }
      ],
      "outputs": [ { "name": "IMAGE", "type": "IMAGE", "links": [ 8 ] } ],
      "pos": [ 1150, 100 ]
    },
    {
      "id": 7,
      "type": "SaveImage",
      "widgets_values": [ "Z-Image-Output" ],
      "inputs": [ { "name": "images", "type": "IMAGE", "link": 8 } ],
      "pos": [ 1350, 100 ]
    }
  ]
}
Troubleshooting: Why Does It Look Bad?
Even with the JSON above, you might hit walls. Here are the top 3 fixes for Z-Image issues.
1. The "Plastic Skin" Effect
Problem: People look like wax figures.
Fix: This happens because the CFG is too high or you are using the wrong scheduler.
- Ensure CFG is 1.0.
- Add noise injection to your prompt: "film grain, high detailed skin texture, pore details, raw photo"
- Pro Tip: Use the
dpmpp_2m_sdesampler if Euler feels too soft.
2. Text is Gibberish
Probdlem: You asked for a sign saying "COFFEE" and got "C0FFEE3".
Fix: You are like use the wrong Text Encoder. Z-Image relies heavily on Qwen 3.4B. If you try to run this with just the standard CLIP-L or CLIP-G from SDXL, it will fail to render text. Force the workflow to load the specific qwen_3_4b.safetensors.
3. Out of Memory (OOM)
Problem: "CUDA Out of Memory" on an 8GB card.
Fix: You are running in FP16 (Half Precision).
- Download the GGUF / Quantized version of Z-Image Turbo (look for
z_image_turbo_Q4_K_M.gguf). - Use the
ComfyUI-GGUFcustom node set to load this. It reduces VRAM usage to ~5GB without noticeable quality loss.
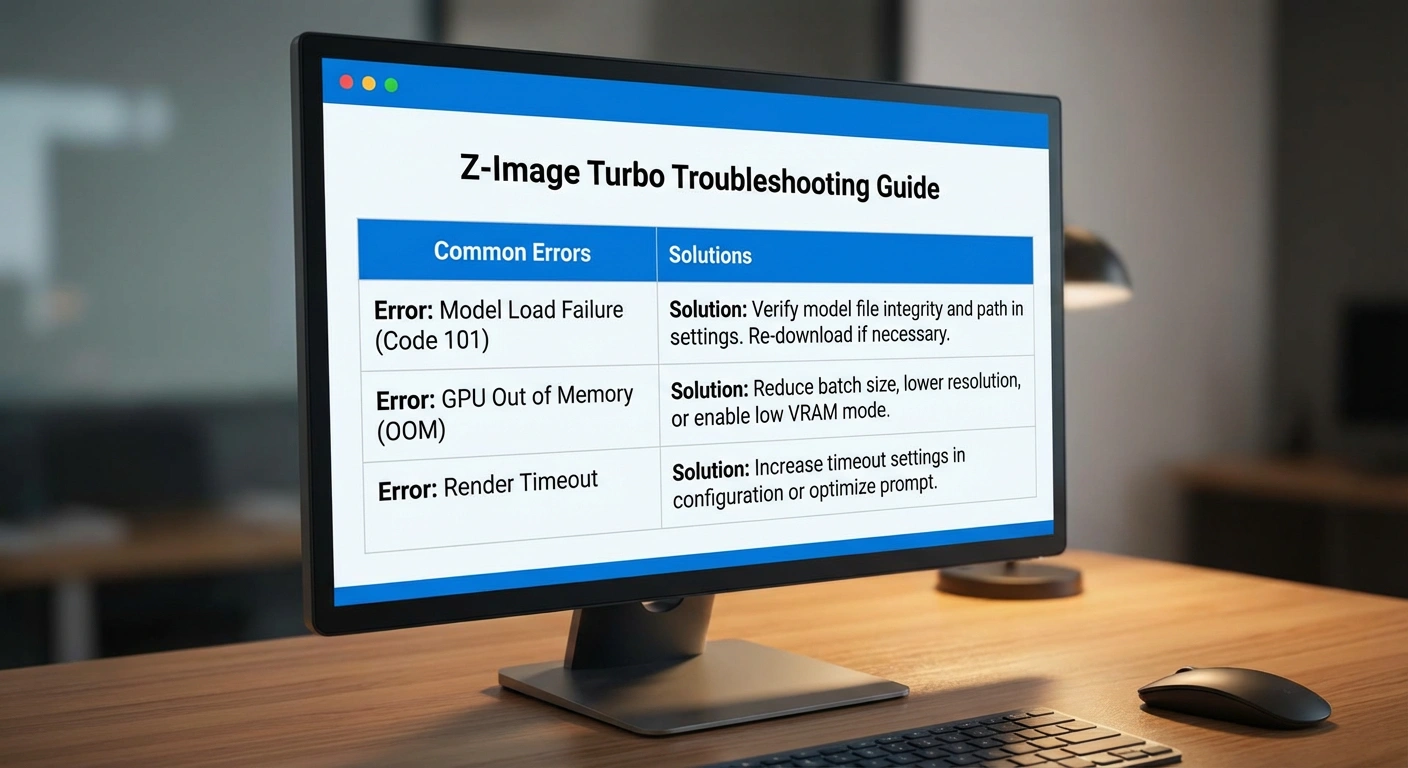
Z-Image Turbo troubleshooting guide - common errors and solutions
Conclusion
Z-Image Turbo is currently the best "daily driver" model for commercial work. It is fast enough for rapid prototyping (8 steps!) but smart enough to handle complex typography instructions.
Your Action Item:
- Download the BF16 version if you have 12GB+ VRAM.
- Download the Q4_K_M GGUF version if you have 6GB-8GB VRAM.
- Load the JSON above and prompt: "A neon sign on a brick wall that says 'Z-IMAGE', cyberpunk city background."
If you hit any issues, revisit the troubleshooting section. The key is using the correct Text Encoder (Qwen) and keeping CFG at 1.0.