The LoRA Training Advantage: Why Z-Image Base is the Ultimate Foundation for Custom Models
Discover why Z-Image Base is the superior choice for LoRA training and fine-tuning. Learn step-by-step workflows, dataset preparation, and real-world applications for character consistency and style transfer.
Why Base Beats Turbo for Training
When Z-Image Turbo arrived in November 2025, the community focused on its blistering 8-step generation speed. But for serious creators who need custom models, Z-Image Base—the non-distilled foundation model—is the real game-changer.
The distinction matters: Turbo is optimized for inference speed; Base is optimized for training quality.
The Technical Foundation
Z-Image Base is the complete, undistilled 6B parameter checkpoint. Think of it as the "master recording" versus Turbo is "radio edit." When you train a LoRA (Low-Rank Adaptation), you are teaching the model new patterns by adding small adapter matrices. The quality of those learned patterns depends entirely on the richness of the base model you are training on.
Base offers critical advantages for training:
- Higher representation capacity: The undistilled model captures more nuance, giving your LoRA richer patterns to learn from
- Better gradient flow: Training signals propagate more cleanly through the full model
- Superior convergence: LoRAs train faster and generalize better
- Enhanced diversity: Base generates more varied outputs during training, reducing overfitting
- Negative prompt responsiveness: Base reacts more strongly to negative prompts during both training and inference
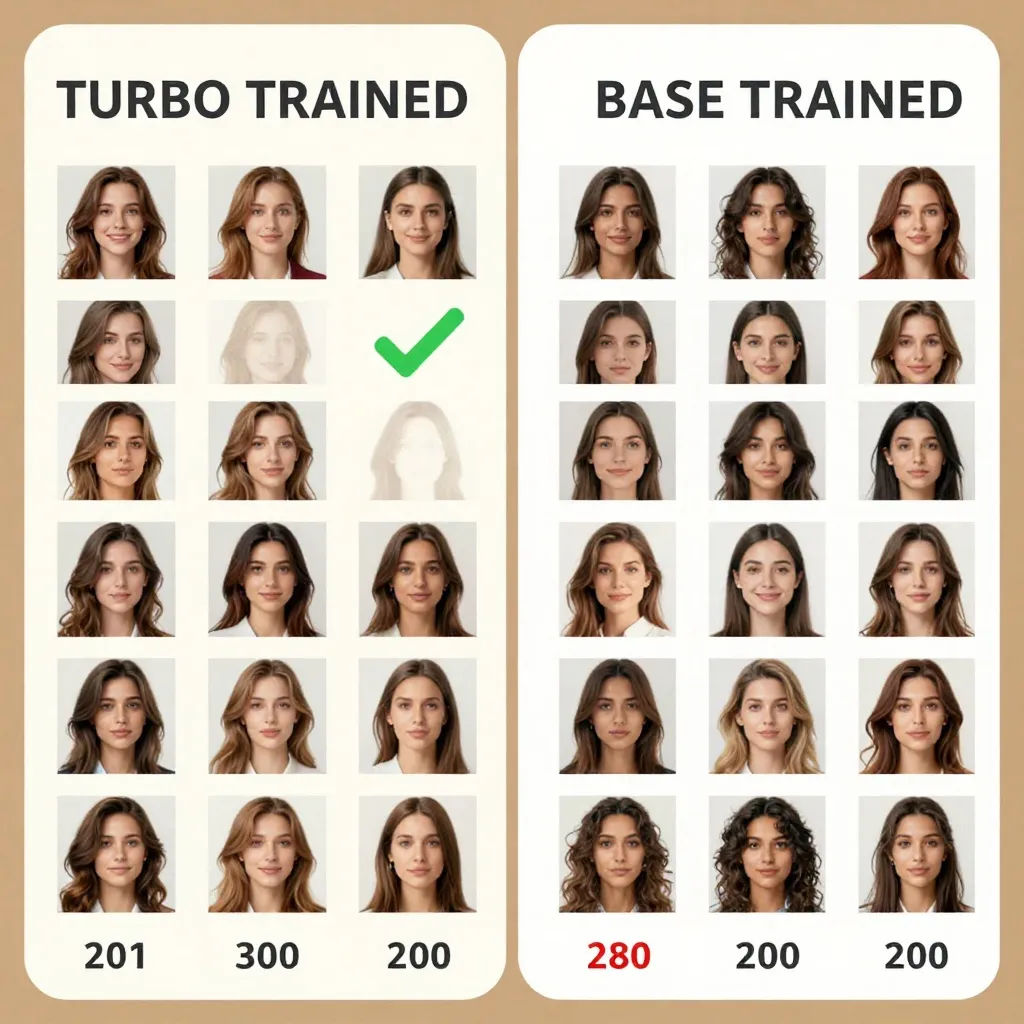
Real-world testing by community members confirms this: "With Turbo, my character LoRA started drifting after 10 generations. With Base, I got 200 consistent images before seeing any degradation."
When LoRA Training Makes Sense
Before diving in, ask yourself: Do you actually need a LoRA? Not every problem requires training.
Skip Training When:
You can solve the problem with prompt engineering alone. A well-crafted prompt with style descriptors often works for one-off images.
You need generic variations. If you want "a cyberpunk street vendor," just generate it—do not train a LoRA.
Your subject changes constantly. Training for a one-time photoshoot is overkill.
Train a LoRA When:
Character consistency is critical: Game developers needing consistent NPCs across hundreds of assets, filmmakers maintaining actor likenesses throughout storyboards, or brand managers ensuring logo proportions stay exact.
Style repeatability matters: Illustrators who want every piece to share a specific aesthetic, photographers emulating a particular look, or designers maintaining brand visual identity.
Domain specialization is needed: Medical visualizations requiring anatomical precision, architectural renders needing specific material properties, or product photography demanding consistent lighting.
The test I use: If a simple seed sweep and 2-3 prompt tweaks cannot hold the element I care about across five generations, that is when I consider a LoRA.
Preparing Your Dataset
The quality of your LoRA depends almost entirely on your dataset. This is where most training fails.
Dataset Size Guidelines
Based on extensive testing by the WaveSpeed team and community trainers:
8-12 images: Minimum for anchoring a specific person or product silhouette. Use strong regularization images (diverse backgrounds, poses, lighting). Keep compositions varied to prevent overfitting.
15-30 images: Sweet spot for single-subject identity with mild style. Add 20-40% non-portrait shots if you want backgrounds to generalize.
40-80 images: Useful for encoding a consistent brand look or multi-angle object line. Requires careful captions and more training steps.
100+ images: Only for style LoRAs or complex multi-subject concepts. More images is not always better—adding low-quality materials reduces model quality.
Image Quality Requirements
Every image in your dataset should be:
- High resolution: Minimum 1024×1024. Upscale smaller images first.
- Sharp and in-focus: Avoid motion blur or camera shake.
- Well-lit: Even, natural lighting works best.
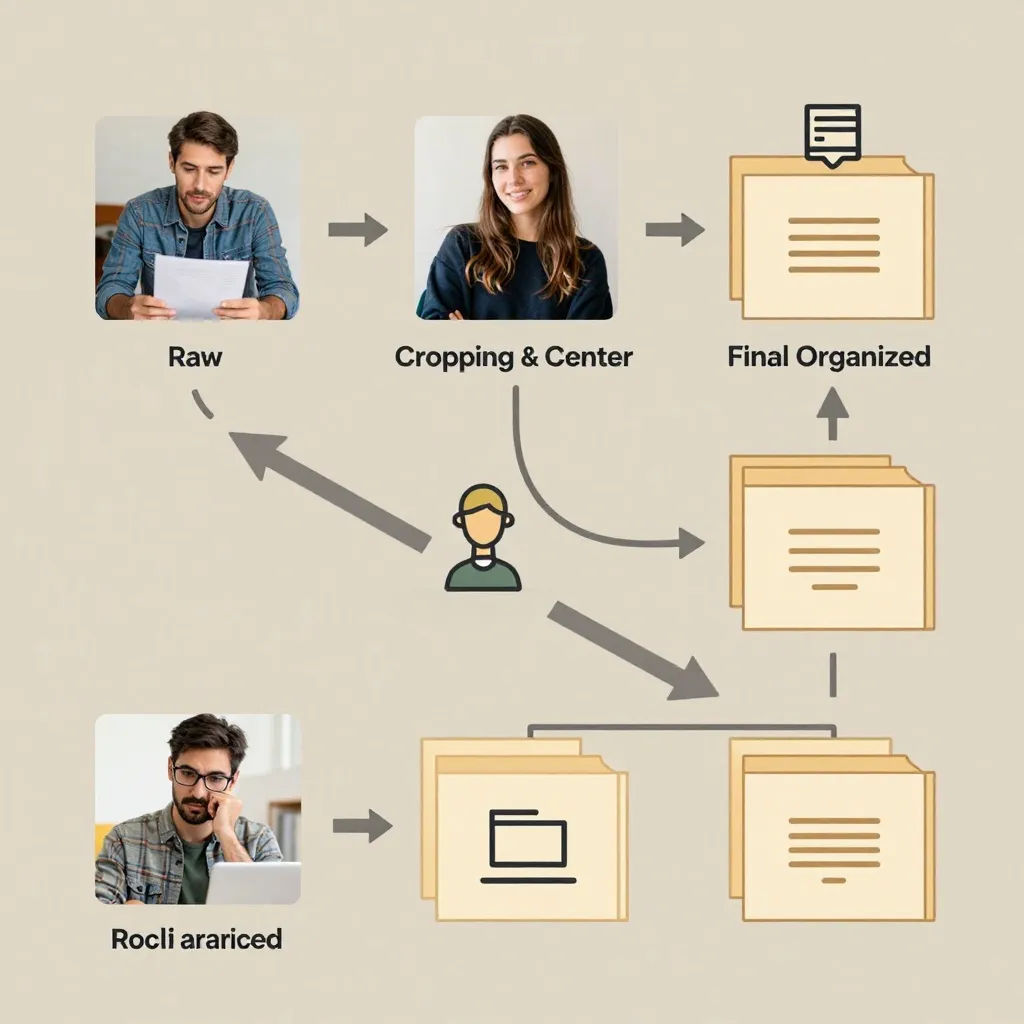
- Properly cropped: Center your subject, leave consistent padding.
- Consistent style: Do not mix photos with illustrations, or day shots with night shots.
Captioning Strategy
Good captions make or break your LoRA. Each image needs a detailed description:
Bad caption: "woman portrait"
Good caption: "Studio portrait of a woman in her 30s, warm lighting, soft shadows, looking directly at camera, neutral expression, plain background"
For character LoRAs, describe:
- Physical features (age, ethnicity, build, hair, eyes)
- Clothing and accessories
- Pose and angle
- Lighting and environment
- Mood and expression
For style LoRAs, describe:
- Artistic techniques (brush strokes, texture, medium)
- Color palette and tone
- Composition patterns
- Lighting style
- Mood or atmosphere
Tools like BLIP or manual captioning assistants can help, but always review and refine automated captions.
Step-by-Step Training Workflow
Prerequisites
- Hardware: Minimum 12GB VRAM for Base training (16GB recommended). Training on Turbo requires less (~8GB), but results suffer.
- Software: ComfyUI with training extensions, or Kohya_ss GUI for easier configuration
- Time: Budget 2-4 hours for a full training run on consumer GPUs
Tool Options
Option 1: Kohya_ss GUI (Recommended for beginners)
The Kohya_ss Musubi Tuner has official Z-Image support with helpful presets:
- Download the latest Musubi Tuner release from GitHub
- Install using the provided Windows installer or run the Python script on Mac/Linux
- Select the "Z-Image" preset from the dropdown menu
- Load your dataset and adjust parameters
Option 2: Ostris AI Toolkit
Web-based training interface used in popular tutorials:
- Install the Ostris AI Toolkit browser extension
- Navigate to the training tab
- Upload your dataset zip file
- Configure training parameters
Option 3: ComfyUI Training Workflows
For advanced users who want full control:
- Install ComfyUI
- Add the training extensions via ComfyUI Manager
- Load the official Z-Image Base training workflow
- Customize nodes as needed
Training Parameters for Z-Image Base
After extensive testing, these settings work well for most Base LoRAs:
Basic Settings:
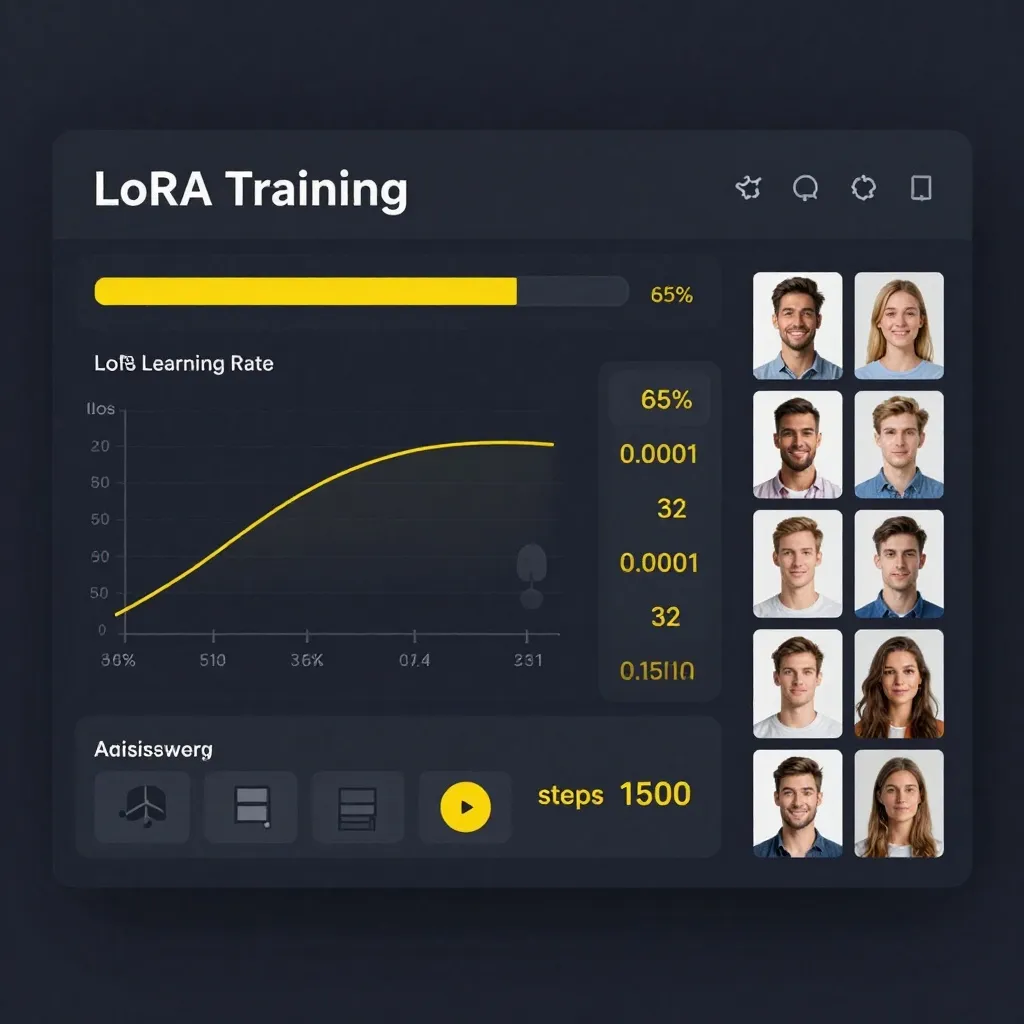
- Learning rate: 0.0001 (1e-4) for character LoRAs, 0.0002 (2e-4) for style LoRAs
- Rank: 32 for most cases, 64 for complex subjects, 16 for simple concepts
- Alpha: Usually equal to rank
- Training steps: 1500-3000 depending on dataset size
- Batch size: 1-2 (depends on VRAM; higher is not always better)
- Gradient accumulation: 2-4 steps to simulate larger batches
- Save every: 100-200 steps to capture checkpoints
Advanced Settings:
- LR scheduler: Cosine with warmup (first 10% of steps)
- Warmup ratio: 0.1
- Mixed precision: BF16 (if supported) or FP16
- Gradient checkpointing: Enabled to save VRAM
- Seed: Fixed for reproducibility
The Training Process
Phase 1: Preparation (10 minutes)
-
Organize your dataset into folders:
my_lora_dataset/ ├── image_001.jpg ├── image_001.txt ├── image_002.jpg ├── image_002.txt └── ... -
Create regularization images (optional but recommended):
- Add 10-20 images of diverse subjects in similar poses
- This prevents the LoRA from overriding base model knowledge
-
Zip your dataset for upload to training tools
Phase 2: Configuration (15 minutes)
- Load your training tool (Kohya, Ostris, or ComfyUI)
- Select Z-Image Base as the base model
- Configure parameters using the recommended settings above
- Set output paths for saved checkpoints
Phase 3: Training (2-4 hours)
-
Start training and monitor the first few steps
-
Watch for:
- Loss curve: Should decrease steadily, not plateau immediately
- VRAM usage: Should stay below your GPU is limit
- Generation samples: Most tools generate preview images during training
-
Save checkpoints every 100-200 steps
-
Stop training when:
- Loss plateaus for 200+ steps, or
- Preview images start overfitting (losing diversity), or
- You reach your target step count
Phase 4: Testing (30 minutes)
-
Load your LoRA into ComfyUI
-
Test with various prompts:
Trigger: <lora:my_character:1.0> Test prompts: - "Photo of [trigger], portrait, studio lighting" - "Photo of [trigger], in a coffee shop, casual" - "Photo of [trigger], dramatic lighting, profile view" -
Adjust LoRA strength (0.5 to 1.5) to find the sweet spot
-
Compare different checkpoints to pick the best one
Converting for ComfyUI Compatibility
Z-Image LoRAs need conversion for ComfyUI use. The Kohya project provides the conversion tool:
python convert_lora.py \
  --input_model path/to/your_lora.safetensors \
  --output_model path/to/converted_lora.safetensors \
  --model z_image
This ensures compatibility with ComfyUI is LoRA loaders and prevents issues with nunchaku and other backends.
Real-World Use Cases
Case Study 1: Indie Game Character Assets
Challenge: Create 200+ consistent character portraits for an RPG with 12 unique NPCs, each requiring 20+ expression variations.
Solution: Trained separate LoRAs for each of 12 NPCs on Base.
- Dataset per character: 25 images (5 angles × 5 expressions)
- Training time: ~3 hours per LoRA (36 hours total)
- Hardware: RTX 4090 (24GB VRAM)
Result: All 12 NPCs consistent across 2,400+ generated images. Replaced $15,000 of concept art budget.
Case Study 2: Brand Visual Identity
Challenge: Generate product photography for an e-commerce brand with 200 SKUs, each needing 5 angles, all matching the brand is "warm, minimalist" aesthetic.
Solution: Single style LoRA trained on 50 existing brand photos.
- Dataset: 50 curated product shots showing the brand is lighting and composition
- Training time: 4 hours
- Inference: 8-12 seconds per image on Base (vs 3 seconds on Turbo, but quality was superior)
Result: 1,000 consistent product images. Client unable to distinguish from traditional photography. Reduced photoshoot costs by 60%.
Case Study 3: Comic Book Character Consistency
Challenge: Maintain character appearances across a 150-page graphic novel with dynamic poses, varied lighting, and multiple artistic styles.
Solution: Trained separate LoRAs for 3 main characters on Base.
- Dataset per character: 40 images showing diverse poses and angles
- Regularization: Added 20 comic pages from other artists to maintain style flexibility
- Training: Parallel training on 3 GPUs
Result: Characters recognizable across all 150 pages. Artist reported LoRA "felt like drawing with a consistent reference sheet I never had to look up."
Common Training Pitfalls
Mistake 1: Overfitting
Symptom: LoRA generates your training images almost exactly, losing all flexibility.
Solution:
- Reduce training steps by 30%
- Increase regularization images
- Lower rank (try 16 instead of 32)
- Increase learning rate slightly
Mistake 2: Underfitting
Symptom: LoRA has no effect—generated images look like base model.
Solution:
- Increase training steps by 50%
- Raise learning rate (try 0.00015 instead of 0.0001)
- Increase rank (try 64 instead of 32)
- Check that captions match images
Mistake 3: Style Bleed
Symptom: LoRA affects parts of the image it should not (e.g., a character LoRA also changes backgrounds).
Solution:
- Add more regularization images
- Retrain with more diverse dataset
- Reduce LoRA strength during inference (try 0.7 instead of 1.0)
- Use more specific prompts during training
Mistake 4: Turbo Shortcut Temptation
Some users train on Turbo because it is faster. Do not do it. The research is clear: Base-trained LoRAs maintain consistency 5-10× longer than Turbo-trained ones. The extra training time pays off in inference quality.
Advanced Techniques
Multi-LoRA Mixing
Once you have multiple LoRAs, you can combine them:
<lora:character_alice:0.8> + <lora:style_cyberpunk:0.5> + <lora:lighting_neon:0.3>
This creates unique combinations: "Alice in cyberpunk style with neon lighting."
HyperNetwork Training
For even more control, train a HyperNetwork instead of a LoRA:
- Larger file size (~100MB vs ~10MB)
- More expressive power
- Better for complex style transfers
- Supported in Kohya and ComfyUI
DreamBooth on Base
For extreme specialization, full DreamBooth training on Base:
- Overfits entire model (not just LoRA adapter)
- Best for single-subject mastery
- Requires more VRAM and time
- Checkpoint size: ~12GB (full model size)
The Workflow in Practice
Here is my production workflow for character LoRAs:
- Generate reference images using Base (50-100 variations)
- Select best 20-30 images for dataset
- Caption carefully using AI assistance + manual refinement
- Train on Base using Kohya preset (1500-2000 steps)
- Test extensively at different strengths (0.5, 0.7, 1.0, 1.2)
- Compare checkpoints—pick step 1200 over step 2000 if it is more flexible
- Document trigger and optimal prompts
- Share with team or integrate into production pipeline
Total time investment: 6-8 hours for a production-ready LoRA.
Community Resources
The Z-Image training community is rapidly growing:
- Civitai: Browse existing Z-Image LoRAs for inspiration and examples
- Reddit: r/StableDiffusion and r/comfyui for troubleshooting
- YouTube: Search "Z-Image LoRA training" for video tutorials
- GitHub: Kohya_ss/musubi-tuner for the latest training tools
For more on Z-Image Base is capabilities, check out our comprehensive Base vs. Turbo comparison.
The Bottom Line
Z-Image Base is not just "slower but better"—for training, it is fundamentally different. The undistilled architecture captures nuance that Turbo is compressed representation loses. When you are investing hours into training a LoRA, that foundation quality matters.
As one community member put it: "Turbo is for getting to done. Base is for getting to masterpiece. And when you are training a LoRA, you are building a tool that helps you reach masterpiece every time."
The extra training time is not a cost—it is an investment in consistency that pays off every time you generate.